背景介绍
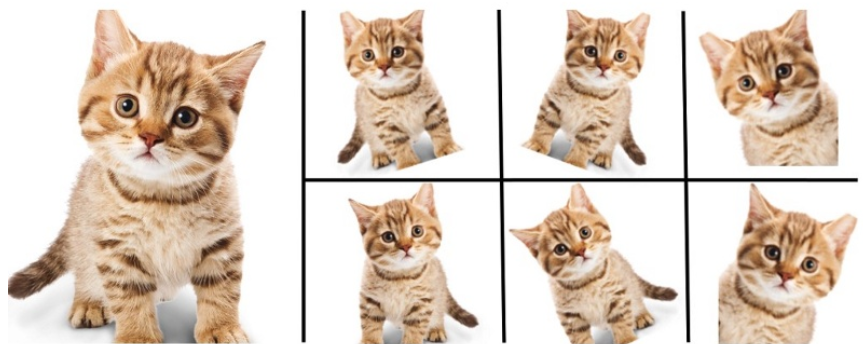
Data Augmentation(数据增强):在深度学习工程实践中,必不可少的是数据集,但是如果自己采集数据集,非常的耗时,而且数量往往不够。这时需要一定的数据增强操作,来扩充自己的数据集使网络更加鲁棒。今天给小伙伴们盘点常用的数据增强操作。
OpenCV和Numpy存储数据差异
OpenCV:在OpenCV中,图像的存储是列在前,行在后,和我们的直观理解不同,因此使用起来,尤其在图像坐标索引时,需要特别注意,有关OpenCV常用操作,可以参考我的另一篇博客OpenCV常用库。
Numpy:在Numpy中,图像的存储是行在前,列在后,这符合我们的理解,因为在学习二维数组时,就是按照行在前,列在后的思想,有关Numpy常用操作,可以参考我的另一篇博客Numpy常用库。
1 | import cv2 as cv |
img1的图像Numpy数组的shape为(400, 300, 3),第一次使用时,奇怪的知识又增加了,一定要记得数据的转换。而且OpenCV读取和显示的图像默认是BGR类型的,这也容易产生错误。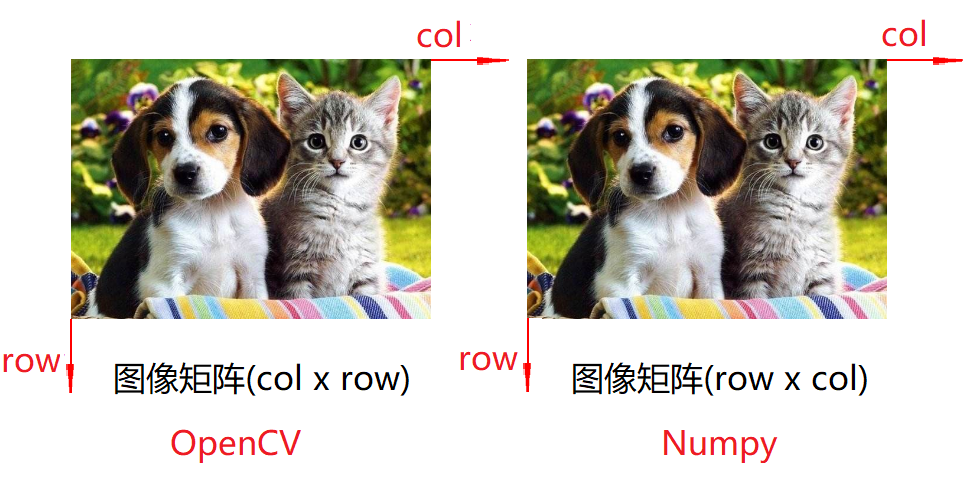
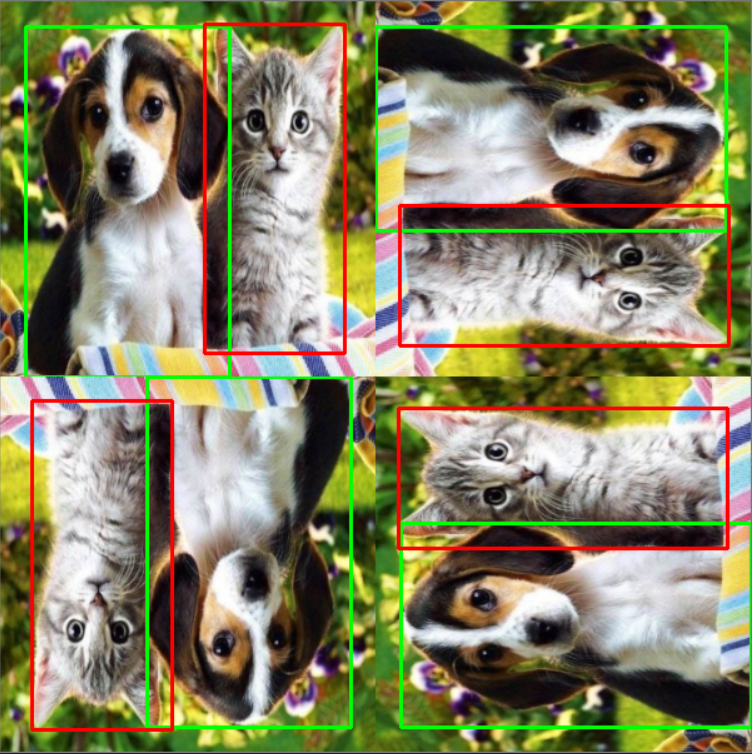
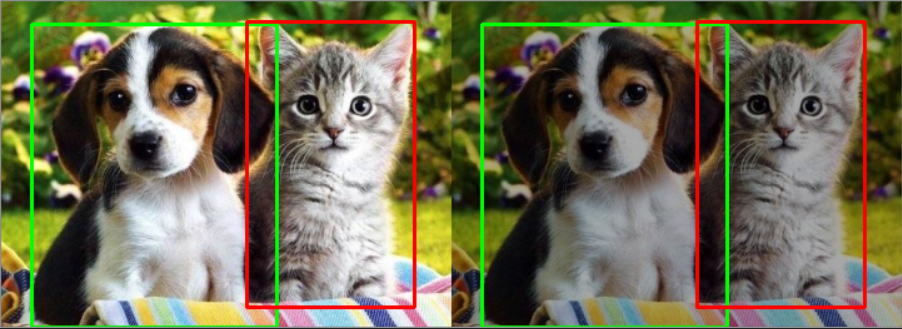
Flip(翻转)
Flip(翻转):对图像进行水平翻转,垂直翻转或者水平垂直同时翻转。翻转时图像的高宽不会发生变化,但是图像的坐标会发生变化。因此在目标检测等问题上,bounding-box需要调整相应的坐标。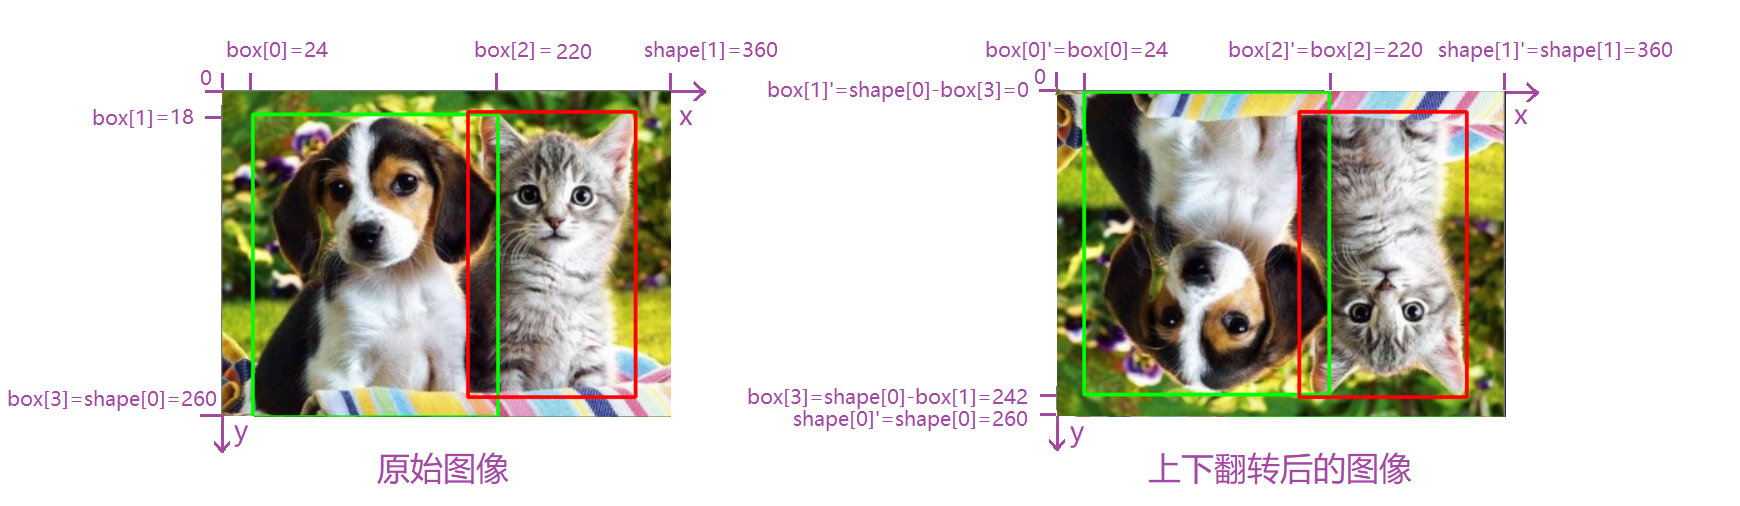
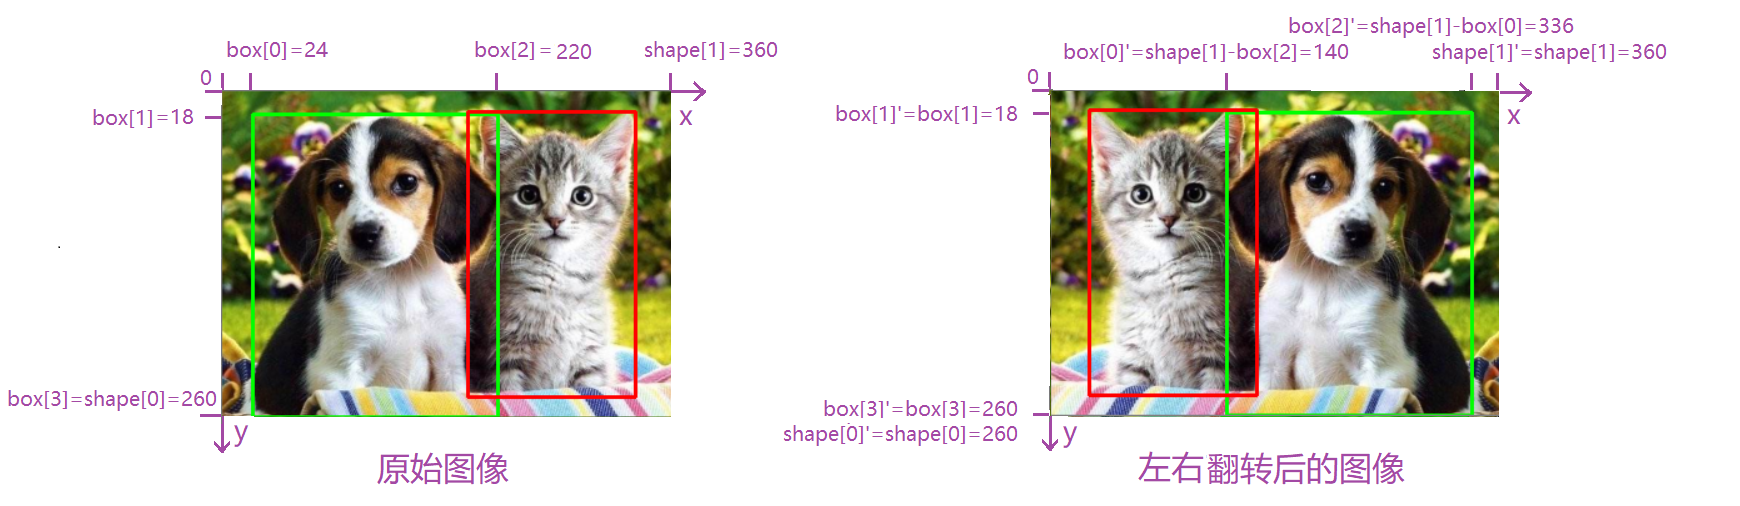

在cv2中已经给我们提供了图像翻转的函数flip。
1 | import cv2 as cv |
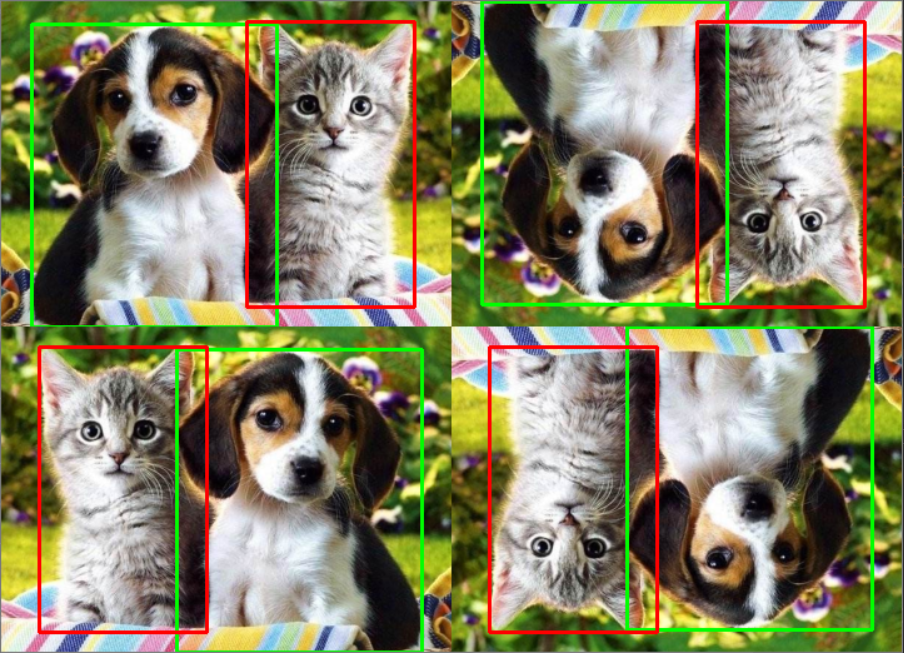
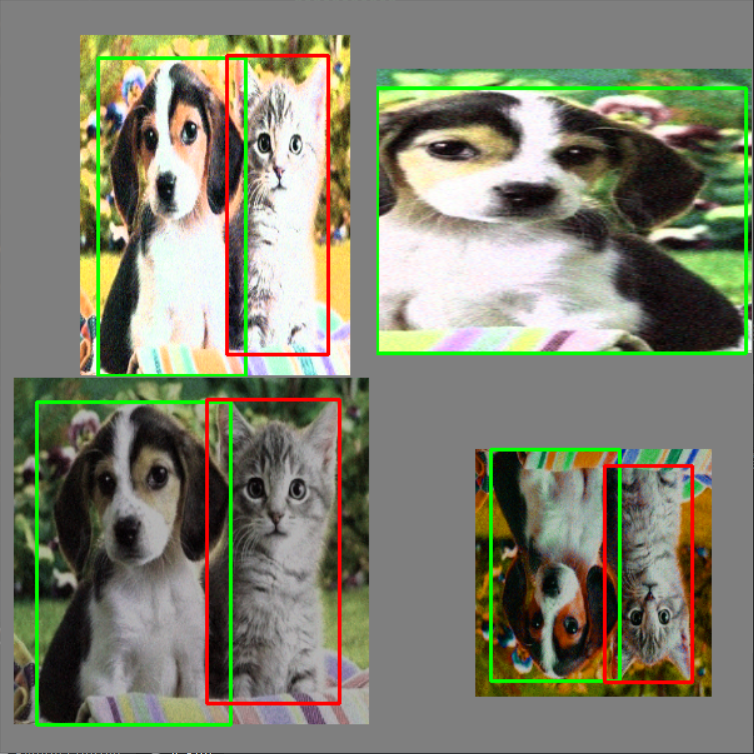
Rotate(旋转)
Rotate(旋转):对图像进行旋转,和翻转不同,不但图像的坐标会发生变化,而且图像的高宽可能会发生变化。因此在目标检测等问题上,bounding-box需要调整相应的坐标。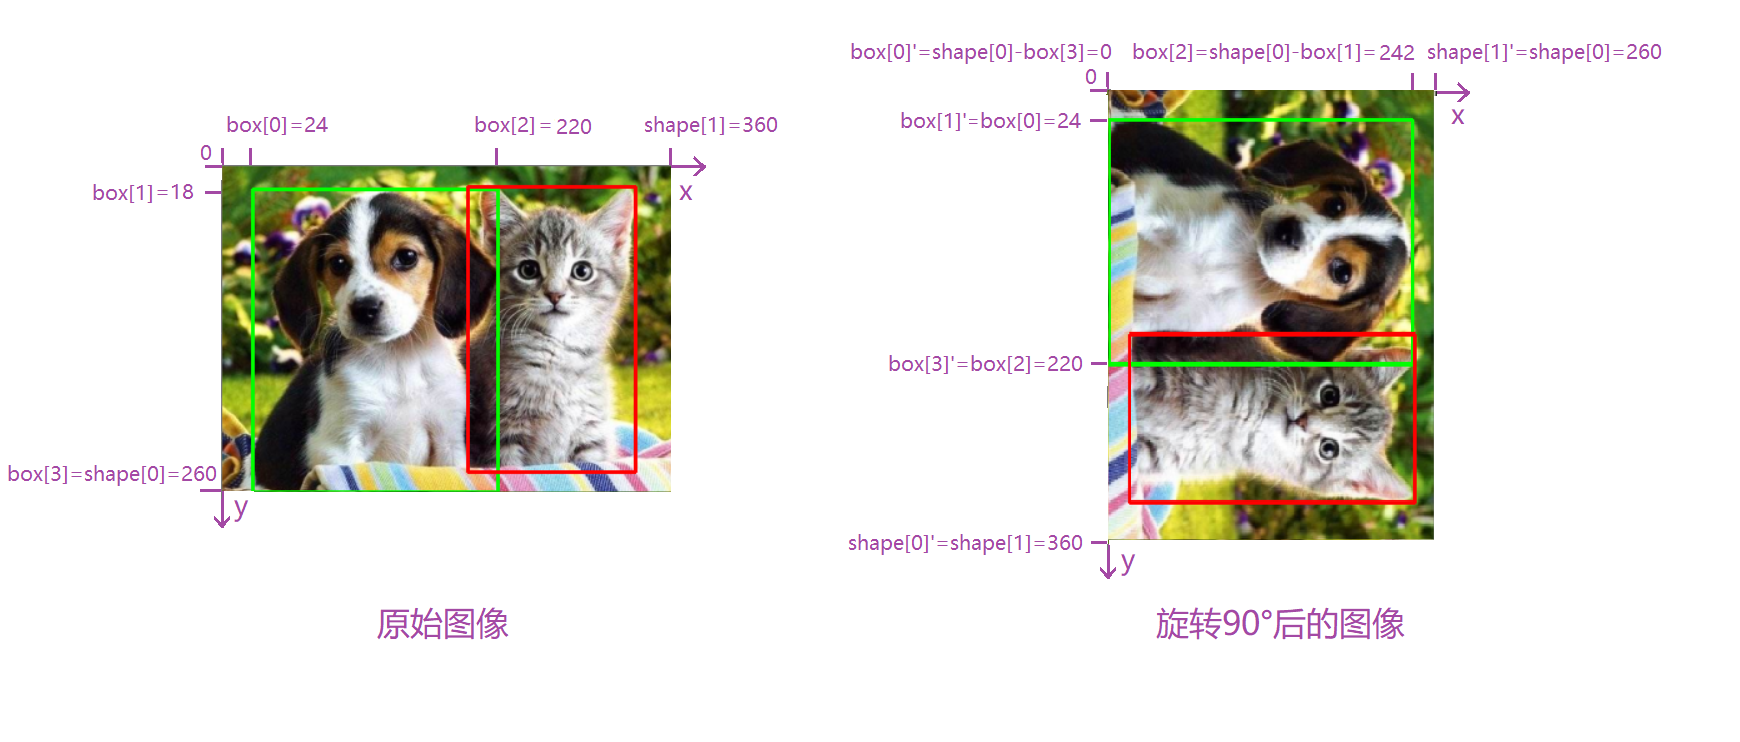
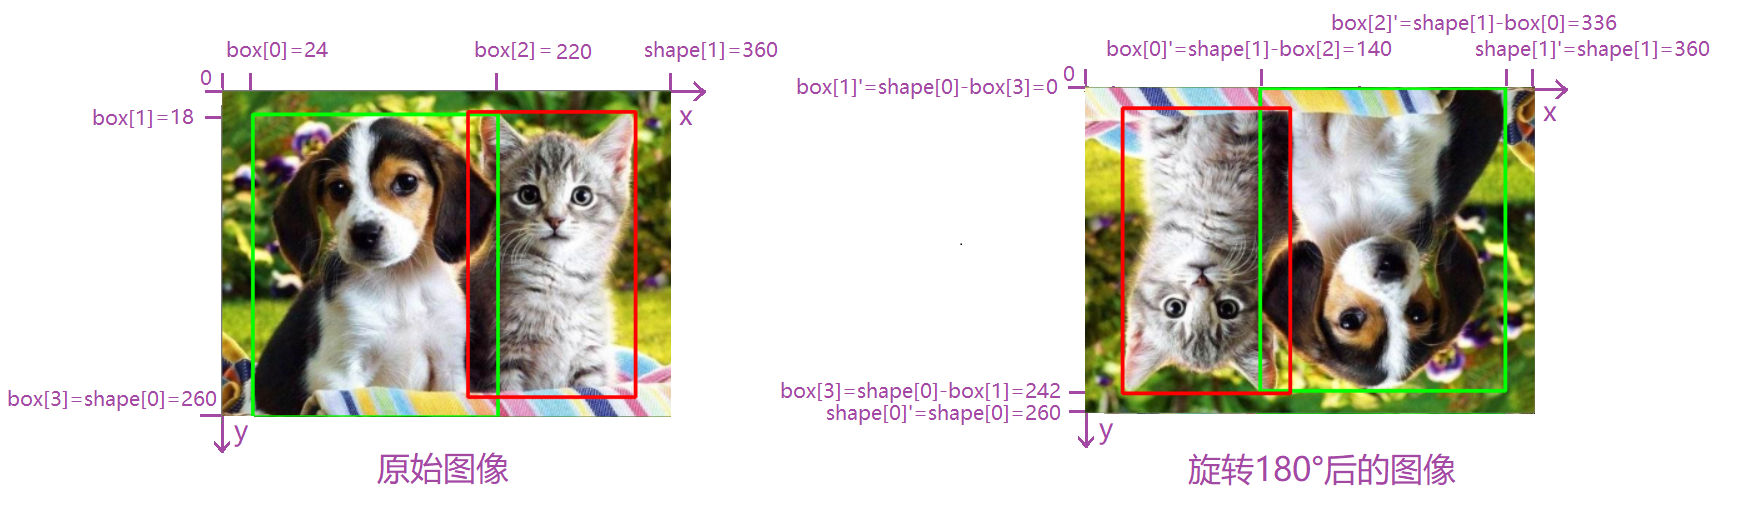
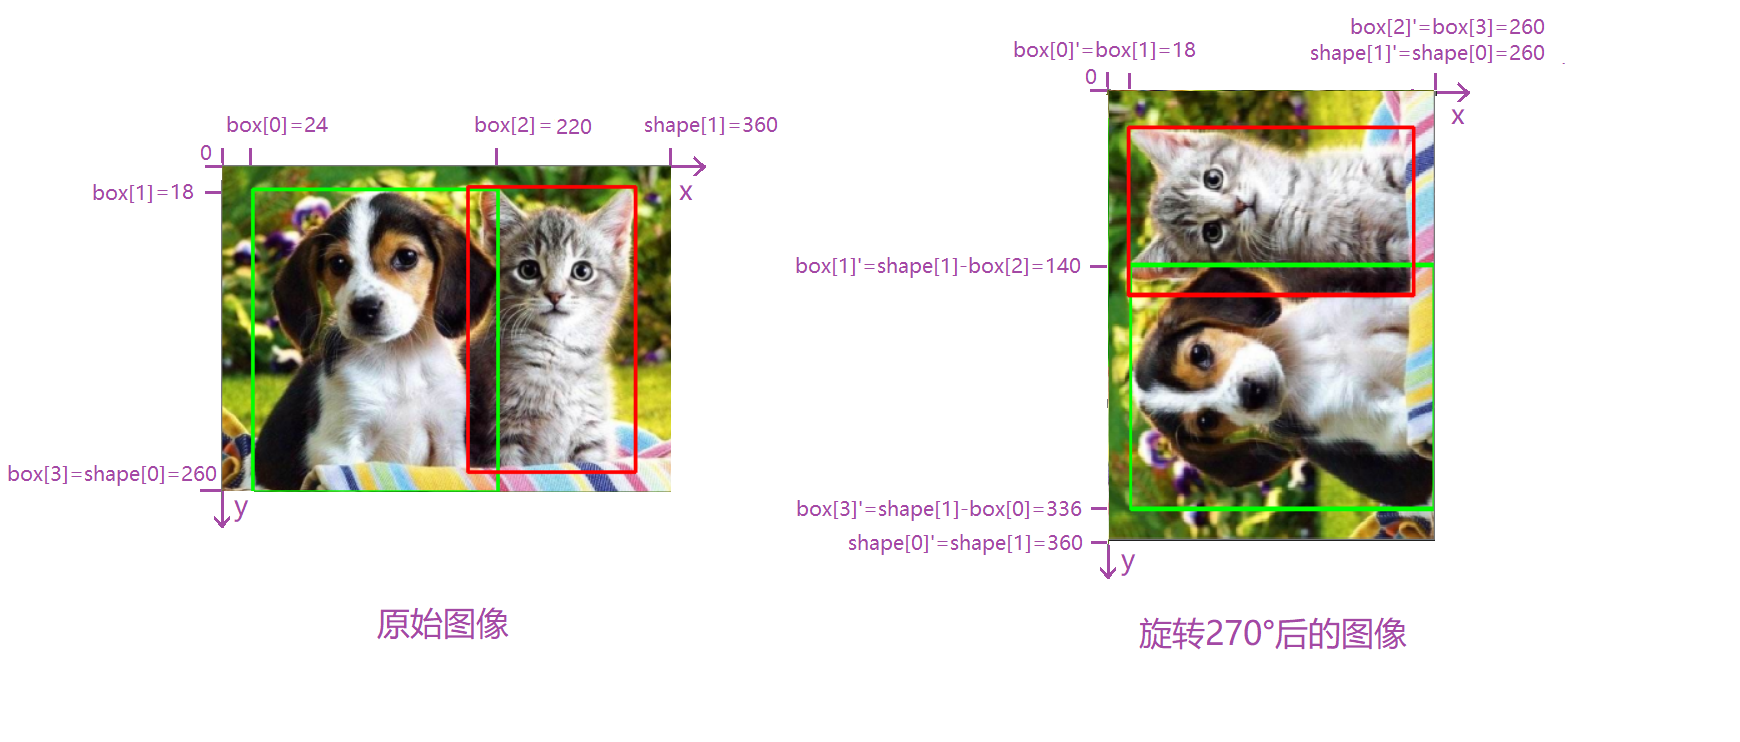
在cv2中已经给我们提供了图像旋转的函数rotate,因为旋转可能会改变图像的高宽,为了展示方便,我先将它们的高宽调成相等。
1 | import cv2 as cv |
Resize(调整大小)
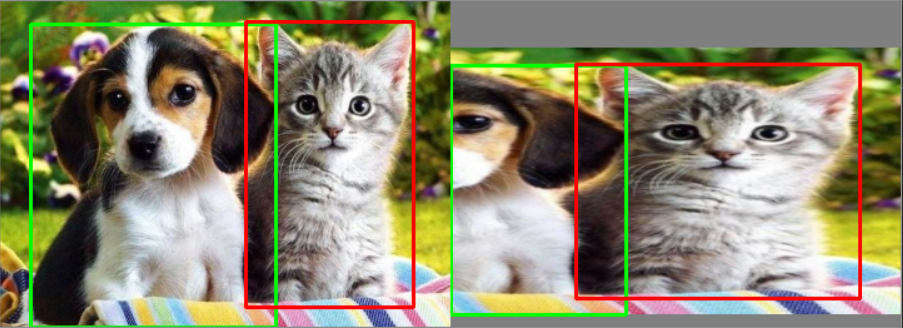
Resize(调整大小):对图像进行大小调整,这个操作是最复杂的,因为神经网络的输入是固定尺寸的图像,所以在大小调整后还要以相同尺寸输出,所以还需要加上灰框或者裁剪,而且还要考虑目标是否会被裁剪,因此在目标检测等问题上,bounding-box需要调整相应的坐标,而且需要判断bounding-box是否有效存在,在这里我设置了一个阈值,如果没有被裁剪掉的面积占总面积的0.25倍以上,则认为bounding-box是有效的,否则删除这个bounding-box。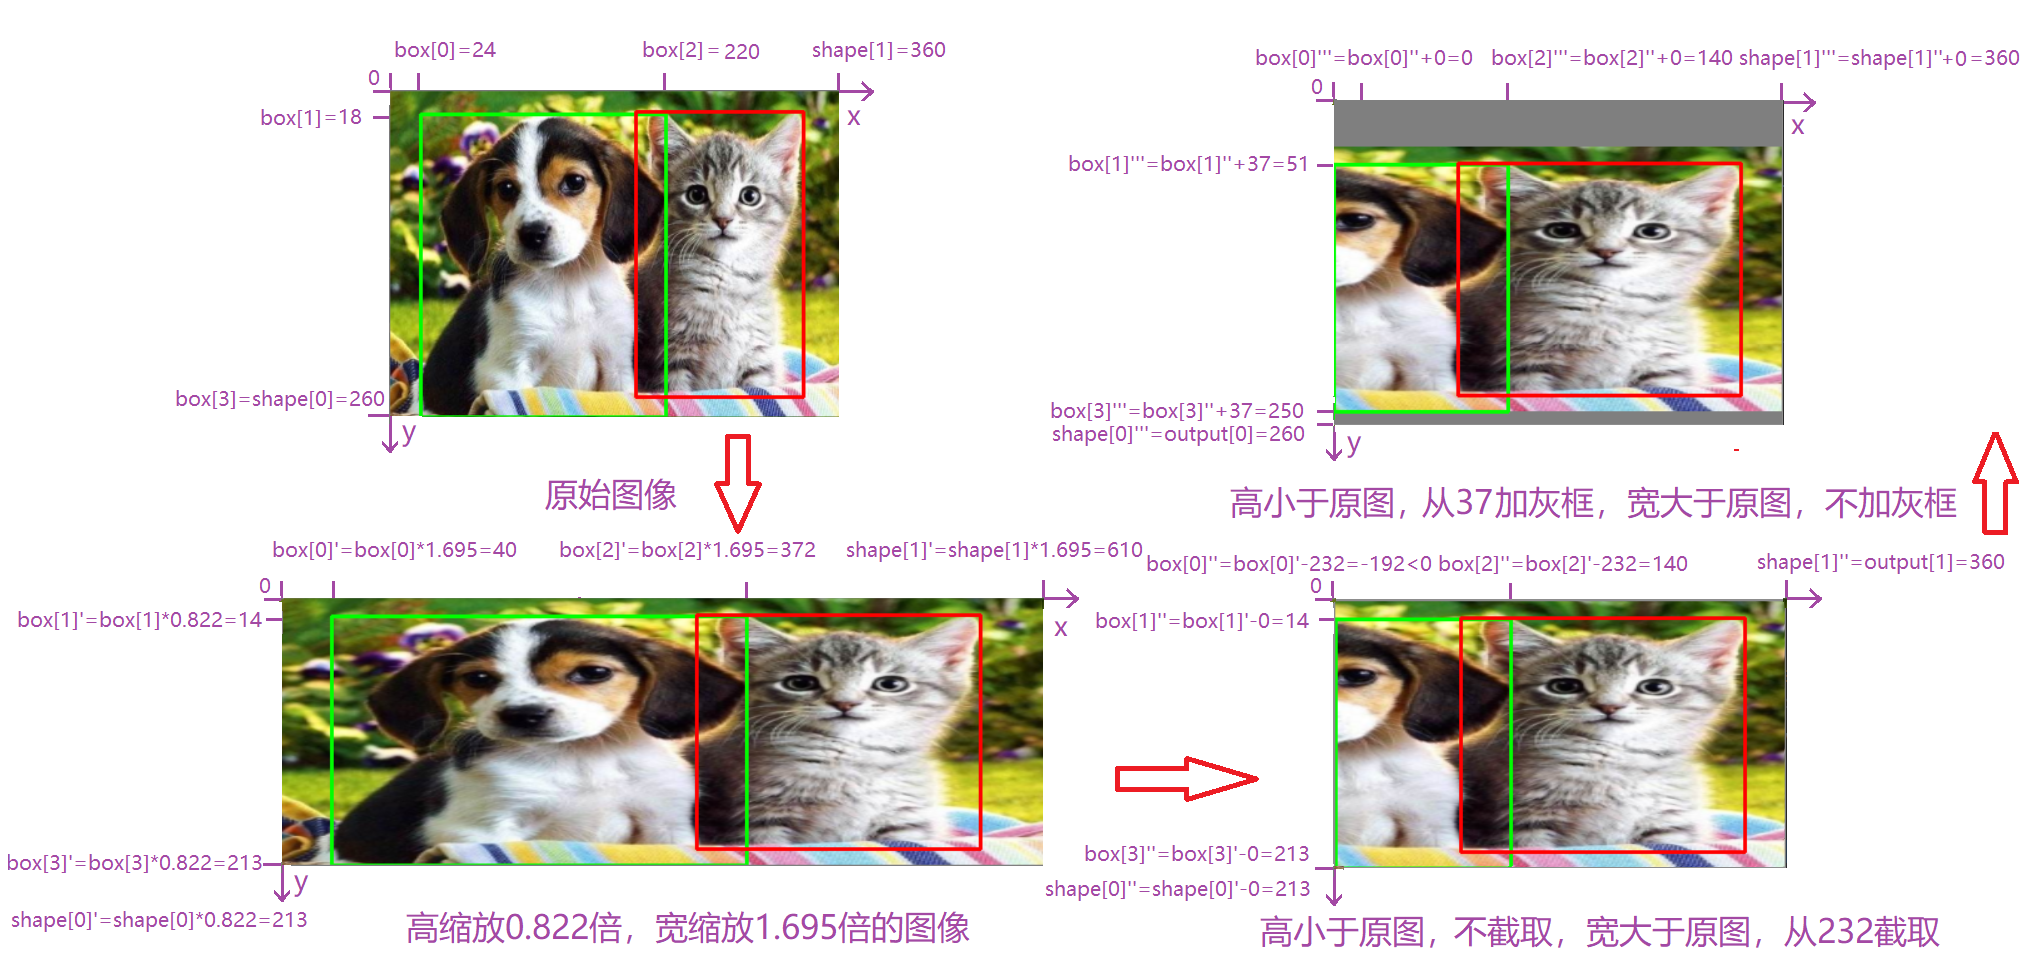
在cv2中已经给我们提供了图像调整大小的函数resize,为了展示方便,我将输出尺寸设置和输入相同。
1 | import cv2 as cv |
Noise(噪声)
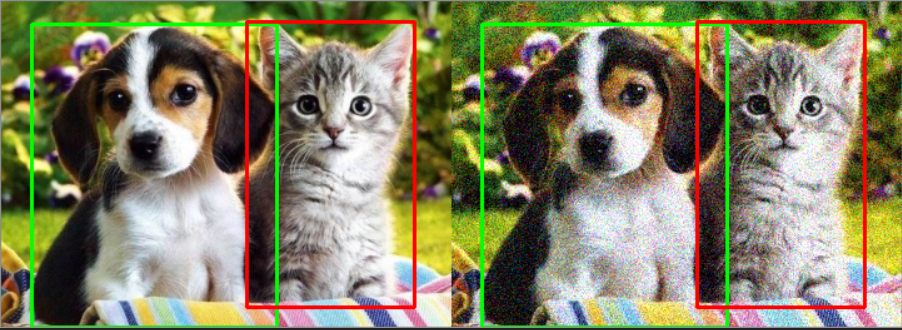
Noise(噪声):对图像添加噪声,这个操作是最简单的,因为添加噪声,尺寸不会改变,因此bounding-box不需要修改,但是要注意,如果加入噪声,数据变为负数后,直接转化为uint8类型的数据会出错,所以需要先clip,将数据限制在[0, 255]之间。
在numpy中直接使用random模块,可以产生随机数,根据需要设置相应的噪声类型即可,一般高斯噪声较为常用。
1 | import cv2 as cv |
HSV(色调,饱和度,明度)
HSV(色调,饱和度,明度):HSV彩色空间不同于我们熟知的RGB彩色空间,其使用色调,饱和度和明度代替红绿蓝三个通道。在OpenCV中,色调的范围是[0, 179],饱和度和明度的范围都是[0, 255],因为改变HSV的数值,尺寸不会改变,因此bounding-box不需要修改
在cv2中直接使用cvtColor进行色彩空间转化,然后给HSV通道引入随机数即可达到改变色调,饱和度和明度的效果。
1 | import cv2 as cv |
整体代码
将上面五种操作结合起来,写在一个函数中,可以实现图像和bounding-box输入,增强后的图像和bounding-box输出。
1 | import cv2 as cv |
其他数据增强操作
上面说的数据增强操作,主要是针对于有bounding-box的目标检测任务,所以数据增强会受到一定的限制。如果我们面对的问题仅仅是一个图像分类问题,那么我们就会有更多的图像增强操作,如设置图像的旋转角度,或者进行仿射操作,但是因为bounding-box的存在,如果进行任意角度的旋转或者仿射操作,bounding-box就不再是一个与坐标轴平行的矩形框,而且图像的尺寸变化也会变得非常复杂,因此通过上面5中数据增强操作已经可以满足绝大部分的需要,所以不探讨如何使用其他方法,有感兴趣的小伙伴们可以去寻找一些自己喜欢的数据增强方式。
小结
数据量是深度学习模型性能的重要决定因素,数据量很少,可能很好的算法也很难达到较好的效果。因此数据增强操作就变得异常重要,如何进行数据增强是小伙伴们必须要掌握的技术。